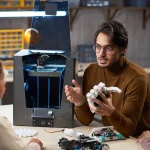
At Telespace, we love how 3D printing unleashes creativity and innovation across so many fields — from makers and hobbyists to businesses developing unique products. But with all the possibilities this technology offers, it’s easy to stumble over some avoidable hurdles. Whether you’re crafting a custom PC case or a prototype component, skipping over critical steps can mean frustrating failed prints or wasted materials.
To help you get the most out of your 3D printing experience, we’ve put together a checklist of the most common mistakes we see — and practical tips to steer clear of them.
Level Your Print Bed Like a Pro
Starting off with the foundation, the print bed’s levelness is the unsung hero of every successful 3D print. It might seem tedious, but ensuring the print bed is perfectly flat and at the right distance from the nozzle sets the stage for your model to stick well and print cleanly. An uneven bed can cause parts of the first layer to lift or not adhere at all, resulting in print failure.
Many modern printers offer auto-leveling features, but even these need occasional calibration. We recommend manually checking your bed level periodically with the classic “paper test” — sliding a thin sheet beneath the nozzle to gauge the gap. This simple step saves a lot of headaches and filament loss.
When precision is key, especially for projects like intricate PC components or functional parts, that initial layer is everything. Just as thoughtfully choosing hardware components enhances your custom PC’s performance, meticulous bed leveling guarantees your print’s foundation won’t crack under pressure.
Choose the Right Filament for Your Project
Filament choice goes far beyond just picking a colour. Each filament type comes with its own strengths and quirks. PLA is popular because it’s beginner-friendly, biodegradable, and produces clean prints, but it isn’t heat-resistant and can be brittle under stress.
If your project demands durability, flexibility, or resistance to heat, alternatives like ABS, PETG, or TPU might be better. ABS, for example, withstands higher temperatures but requires an enclosed printer to prevent warping and emits fumes that demand proper ventilation. PETG offers a good balance of strength and flexibility, ideal for mechanical parts, while TPU is a flexible filament suited for objects needing elasticity.
It’s important to understand these differences and match the filament to the project’s functional requirements. For instance, if you’re printing parts that will serve as mounts or protective covers for electronics — something we often encounter when supporting innovative tech solutions — durability can’t be compromised for ease of printing.
Mind Your Model’s Orientation and Supports
How your model sits on the print bed dramatically influences its strength, surface quality, and print success. While it might be tempting to just place your design flat and hit print, taking time to analyze orientation can save you hours and frustration.
Incorrect orientation can lead to weak structural points because of the layer-by-layer printing process. Overhangs, if not properly supported, might sag or fail entirely. Supports themselves can leave marks or require extensive post-processing to smooth out.
Think of this step as engineering your print for both aesthetic and functional outcomes. Adjusting orientation to minimize the need for supports while optimizing strength in key areas is a skill that comes with practice but pays huge dividends.
This process isn’t unlike configuring a custom PC’s airflow or cable management, where small adjustments lead to better performance and longevity. In fact, the precision and planning needed here echoes the careful design considerations that go into pairing 3D printed parts with high-performance PC hardware, as highlighted in our adjoining post.
Fine-Tune Your Slicer Settings
Your slicer software is your printer’s command centre, turning digital models into precise instructions. But if you overlook the settings here, even the best-designed model can come out flawed.
Default settings can be a good starting point, but they rarely fit every filament or project. Layer height, print speed, nozzle temperature, bed temperature, cooling fans, and retraction settings all influence the quality and success of your print.
For example, printing too fast might cause poor layer adhesion and detail loss, while too slow can unnecessarily extend print times. Retraction settings prevent stringing, but if misconfigured, can cause under-extrusion or clogs.
Taking the time to tweak and test slicer parameters — and save presets tailored to your filament and model types — means better prints with less trial and error. This level of customization and control shares a philosophy with crafting custom PC builds, where every tweak fine-tunes performance and reliability.
Keep Your Printer in Top Shape
Even the most experienced user can find themselves frustrated by hardware issues. Regular maintenance is critical for consistent quality and printer longevity.
Dust, filament residue, and loose belts can sabotage prints and strain your machine. Cleaning the print bed with isopropyl alcohol before each print ensures good adhesion. Checking and tightening belts helps maintain accurate movement, while cleaning or replacing clogged nozzles prevents inconsistent extrusion.
Lubricating rails and screws per your printer’s guidelines reduces wear and tear. These simple habits might seem mundane but save time, money, and frustration down the road — especially when tackling detailed or large prints where failure means significant loss.
Inspect Your Model Before Printing
It’s tempting to trust every STL or OBJ file you download or design, but models sometimes come with hidden errors that cause slicing or printing problems.
Non-manifold edges, holes in the mesh, or floating parts can cause your slicer to misinterpret the design or produce incomplete prints. It’s important to run models through mesh repair tools or software with automatic fixes. Programs like Meshmixer or Netfabb help identify and correct issues you might miss.
Also, consider your model’s wall thickness — if it’s too thin for your nozzle size or filament, the print may be fragile or fail entirely.
This step is crucial when printing functional pieces — such as those that integrate with tech or mechanical builds — where strength and accuracy can’t be compromised. Ensuring the model’s integrity before slicing echoes the precision needed in designing the physical chassis and internal layouts we discussed alongside our recent exploration of custom PCs and 3D printing synergy.
Printing Is a Journey — Precision Creates Possibility
Avoiding these common pitfalls isn’t about making 3D printing intimidating — quite the opposite. When you build good habits around bed leveling, filament selection, orientation, slicer settings, printer upkeep, and model checks, printing becomes a rewarding, creative process.
At Telespace, we’ve witnessed firsthand how mastering these elements empowers users to bring to life everything from eye-catching art pieces to precision parts that integrate seamlessly with high-tech setups. The line where digital creativity meets physical innovation is growing thinner every day.
We believe in helping you navigate this journey with confidence and clarity so that your next print isn’t just a chance experiment — it’s a reliable step toward your vision.
When technology meets thoughtful preparation, the result is nothing short of extraordinary.